

Watch for Water
Like all animals, bees need water. But in the hive, water can also prove deadly. Here's what you need to know to prepare for the spring rains and help your bees stay healthy and thrive this season.
First of all, your bees will need water to cool the hive and dilute their honey so they can eat it. To achieve this, bees send some of the colony members out to forage for water and bring back just the amount they need. If you want to make that work easier on them (and avoid bothering your neighbors who have water features and might not want regular bee visits), you can provide a convenient source of water near your hives. Something as simple as a birdbath with pebbles for the bees to land on can work well. If you want to take it to the next level, you can add a drip feature to ward off mosquito larvae. Even without help, though, bees are pretty good at finding the water they need.

Image courtesy of RURAL SPROUT
Your job, on the other hand, is to focus on keeping excess water out of the hive. Too much moisture in a hive can lead to the growth of molds, fungi, and dangerous bacteria. A moldy hive can make your bees sick, just like a moldy house can make you sick.
Also, you don't want to let condensation form on the inside of the hive cover and start raining down on the bees. This can be especially dangerous if it is still cold enough in your area for the bees to be clustering (at or below 57°F/14°C). Clustering is the honeybee’s winter survival mechanism. It allows them to keep warm in even extreme cold conditions by huddling together and flexing their flight muscles to generate body heat.
If your bees get wet inside the hive, then they also have to spend precious body heat trying to evaporate water and get dry, on top of already trying to stay warm by clustering. Think of it like trying to dry off from a shower by going outside by doing jumping jacks. It’s very inefficient and uses up energy (and honey stores) that the colony needs to make it through the cold spring nights. In the worst case, water drops could cool bees too much too fast, and they could enter a coma state, fall off the cluster, and freeze. Enough water drops could threaten the whole colony’s ability to stay warm and survive.
Now that you know the problem, let’s talk about what you can do about it to give your colony the best fighting chance.
1. Waterproofing
The first step is keeping excess water out in the first place. It's safe to say that if you don't waterproof your hives, you won't make it very far in your beekeeping journey. The good news is there are lots of good options for waterproofing.
The first step is to make sure that your hives are in good condition, not cracked or rotten anywhere. It’s hard to waterproof a hole.
Next, we suggest that you use some kind of waterproof coating on the outside of your hive (and only the outside, bees don’t like any kind of chemicals or coating inside the hive!). A lot of people use paint or stain on the outside of their hives, but we recommend natural solutions such as coating the hive with tung oil or dipping the hive in beeswax.

Dipping in beeswax is very effective, but can also be costly and hard to do at home. Another great option is using 100% tung oil. It's relatively cheap and easy, and 100% tung oil means no additives (additives can reduce drying time a bit, but risk colony health). Tung oil is not just a surface treatment, rather it bonds with the wood to create a waterproof material. You can watch our instructional video on applying tung oil below:
2. Get Your Hives off the Ground
Readers of our recent post on late winter tips will recall that reducing moisture also requires lifting your hive off the ground and properly ventilating it. If your winter was wet, your ground is going to remain cold and damp for a good while after the spring sun has started to warm the air. Also, if the water vapor in the hive has nowhere else to go, it will cause condensation in the hive. Even the bees’ respiration itself creates water vapor, so good ventilation is a must.
Some great ways to get your hive off the ground are to raise your hive with bricks or get a stainless steel hive stand. If you use a stand, we also recommend adding about 6 inches of vaseline to the legs, so that ants will stick and mice will slip. We developed a universal hive stand for both Warre and Langstroth hives, so check it out if you are interested. Some beekeepers have tried using plastic ground covers under their hives instead of raising them, but we do not recommend this, because as Rusty Burlew of HoneyBeeSuite notes, "Plastic can hold moisture in the ground and promote the growth of mold spores close to the hive."

3. Ensure Good Ventilation
Some folks choose to use a screened bottom board to increase ventilation, or to switch between solid and screened bottom boards depending on conditions. This is the type of question that requires local expertise, so we recommend joining your local beekeeping group and asking for advice. When it comes to upper ventilation, we can turn again to Rusty Burlew for a handy DIY tip: making your own screened inner cover.

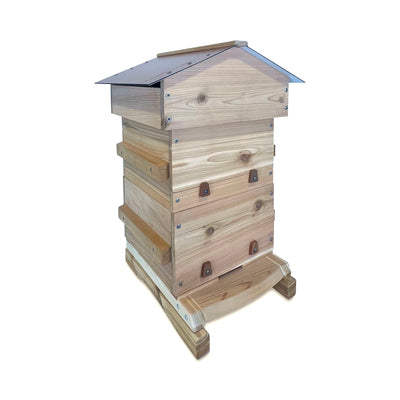
Some beeks prefer to simply notch their inner cover or drill holes high on the side wall to create an "upper entrance" for the bees, maybe also propping up the outer cover a bit with some sticks or rocks to create space. If you are looking for a more universal solution, our Bee Snug All Season Roof (which is currently on sale) is a great way to block rain, insulate, and ventilate all in one step. It also has an integrated feeder option.

The Bee Snug All Season Roof comes with a canvas gasket that creates a propolis barrier between the roof and the colony without blocking airflow, so no inner cover is necessary, and its natural hemp insulation and louvered vents account for condensation and upper ventilation.
Final Tips
Before you go, consider a couple of bits of water wisdom from Professor Dewey Caron, who recommends against feeding "liquid sugar syrup in early spring, as this will add to the moisture stress of the colony." There are a variety of drier options if you need to feed your bees in early spring, including honey. Professor Caron also notes that it is important, if your colony didn't make it through the winter, that you try to find out why. It can take some experience to identify different types of disease, but if you see "water staining" in the hive, that can be a strong sign that moisture played a part. If you learn what went wrong, you can adapt for the future as you help your colonies thrive and enjoy being a part of their life-giving work.
Spring can be a hectic time for beeks, but also one of the most fun. We want to hear your tips for dealing with water in the spring or just any fun spring beekeeping stories you have. Leave a comment below or connect with us on social media. Have a great spring and stay dry!


Leave a comment